[A disclaimer: This is an old process. We no longer record this way. But still…it worked for us starting out in 2013.]
Hello! This page was created for people who want to see how Men in Gorilla Suits is made. Please keep in mind: outside of recording on a smartphone, this is about as basic as it gets. This is just our process, which changes as we learn new things.
We make no claims that this is the best way to use a Zoom H2n and Audacity for making a podcast. (We’d bet good money that it isn’t.) Still…it’s our hope this will at least get you going until you learn more and acquire better gear.
MENU:
The Gear | Before Recording | Creating the MP3 | Getting it All Online | Onward!
The Gear
Men in Gorilla Suits is recorded using Christopher’s Zoom H2N, with Shawn’s Zoom H1 as a backup.
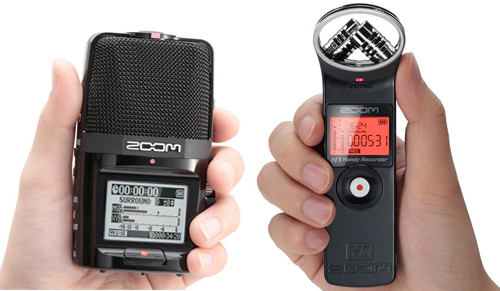
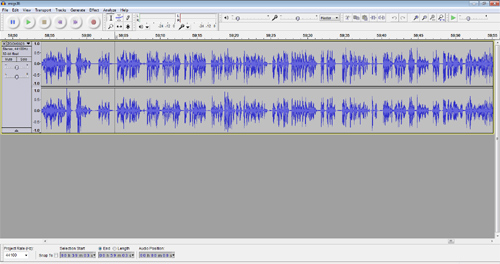
Once recorded, episodes are edited using Audacity, a free audio editor and recorder.
Before Recording
We record two episodes of Men in Gorilla Suits each time we sit down together. This allows us to stockpile episodes and take time off when we have a big backlog. (Also, since we live on opposite sides of the Dallas/Ft. Worth Metroplex from each other, it cuts travel for the podcast in half.)
Most episodes begin through email or text message:
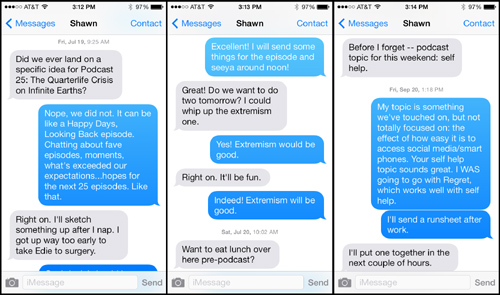
After that, we each create our runsheets (talking points for the episode) and email them to each other. Shawn is more comfortable with a list of talking points; Christopher tends to make notes for his talking points. (There’s no right or wrong way to do this.)
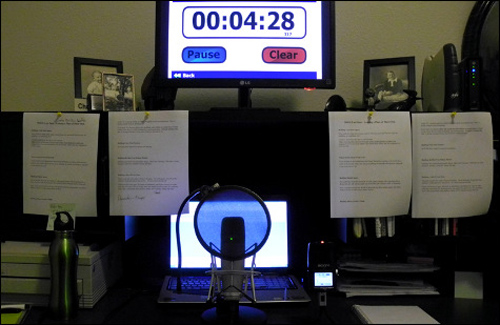
Recording
When it comes to recording, definitely refer to the Zoom H2n user guide for more information. This is what we do when recording an episode.
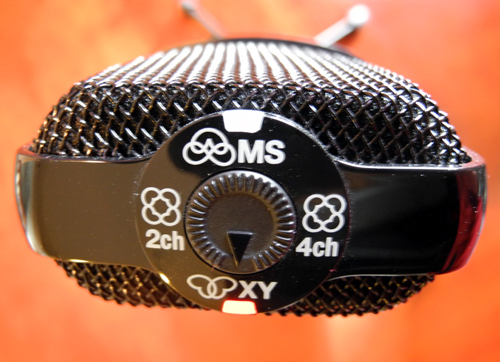
Since we’re both in front of the microphone, we make sure the dial on top of the recorder is set to XY. (This picks up sound in front of and just to the front sides of the microphone, and doesn’t pick up other room sounds from behind.)
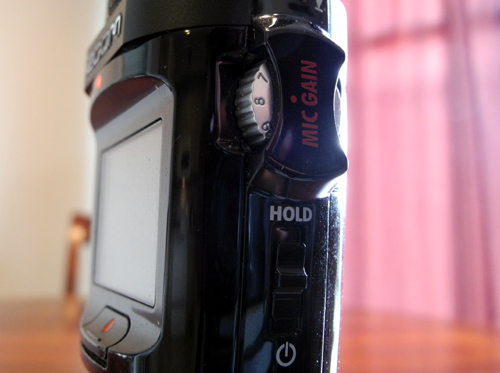
Move the Mic Gain dial until you get your desired sound level. (We shoot for sounds around the -6 level — see the second photo below.)
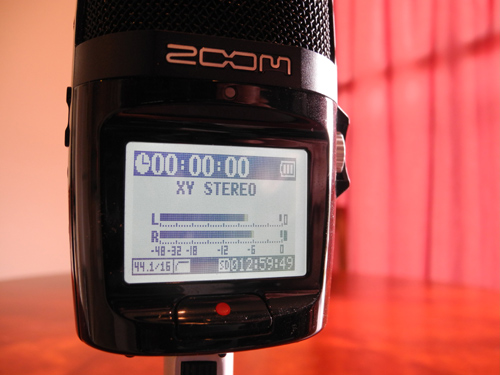
Once everything is set, we press the Record button and record the episode.
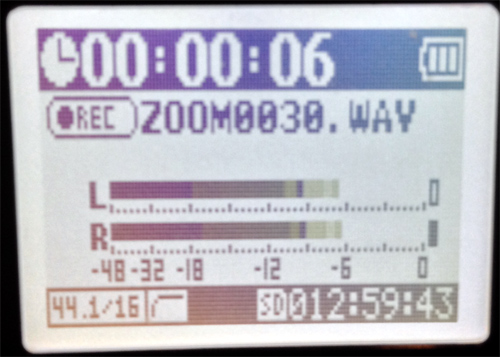
Press the Record button to stop recording.
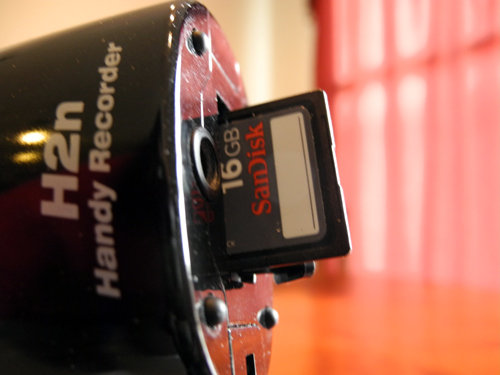
Remove the memory card, and you’re ready for editing!
Editing
A few pointers about navigating in Audacity:
- To zoom in: CTRL+1.
- To zoom out: CTRL+3.
- When zoomed in, click and drag right and left, or use the Right and Left arrow keys, to move through the project.
- Clicking anywhere in the recording creates a starting point for playing sound while editing.
- Use the Play and Stop buttons to listen to the recording.
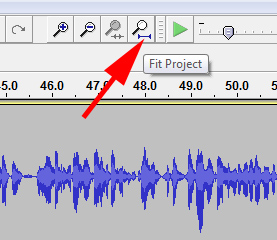
- If zoomed in and you want to see the entire project in the workspace, click the Fit Project button.
Now you’re ready to edit the file!
First Steps
Open the file in Audacity. (NOTE: It may take a moment for the waveform to process.)
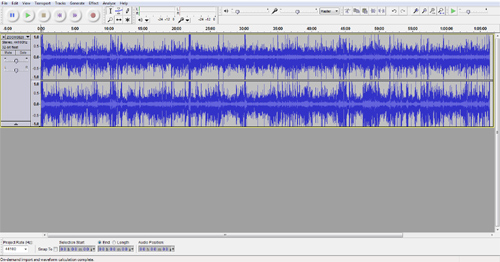
Save the file. (.aup is the Audacity project extension.)
Zoom to the beginning of the episode. (Remember: CTRL+1 zooms in; CTRL+3 zooms out).
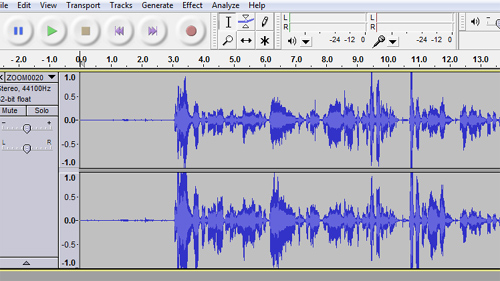
The opening seconds of the recording are ambient room sounds. (We recommend recording at least 10 seconds of ambient room sound — clearly, we don’t always follow our own suggestions!)
Select the opening seconds of the recording (click and drag).
On the menu bar, select Effect > Noise Removal. ( Result: The Noise Removal dialog displays.)
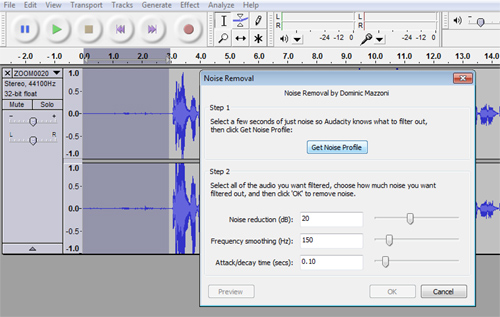
Click Get Noise Profile.
Select the entire file (CTRL+A).
Select Effect > Noise Removal again.
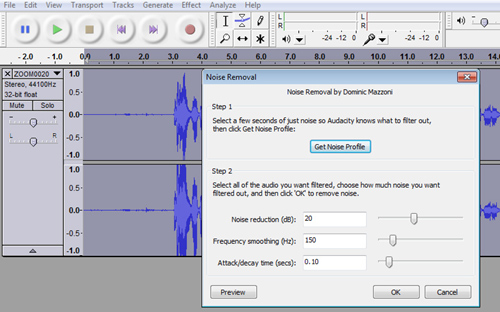
Enter the following settings (Disclaimer: These may not be the best settings for this step — they are settings Christopher found on an Audacity tutorial somewhere online. Experiment if you don’t like the results.):
- Noise reduction (db): 20
- Frequency smoothing (Hz): 150
- Attack/decay time (secs): 0.10
Click Get Noise Profile (this may take a minute or two).
Result: Ambient sound is eliminated from the file so dead space in the recording is silent.
Select and delete the ambient sound lead in to the recording.
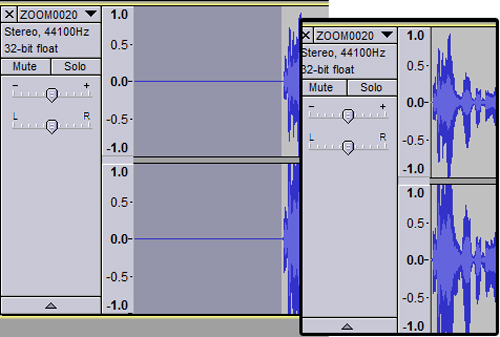
NOTE: We produce Men in Gorilla Suits as is; by that, we mean we don’t edit every little throat clear and other sounds. Unless there’s some big mistake or something that disrupts us for more than a second or two, we don’t go in and delete gaps or tiny mistakes. You may want to, so…here’s what to do.
Deleting Sections
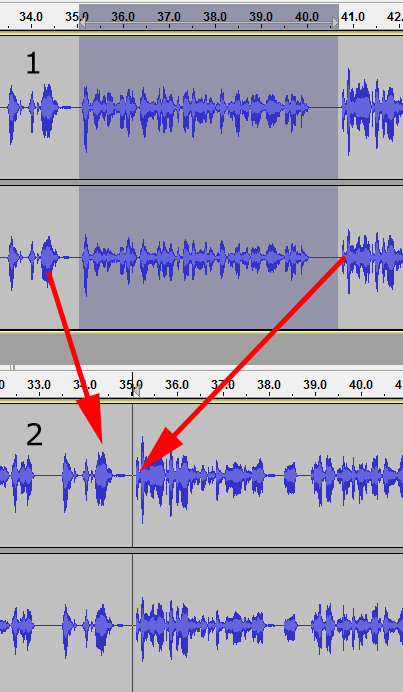
To delete the gap and section shown by the arrows below…
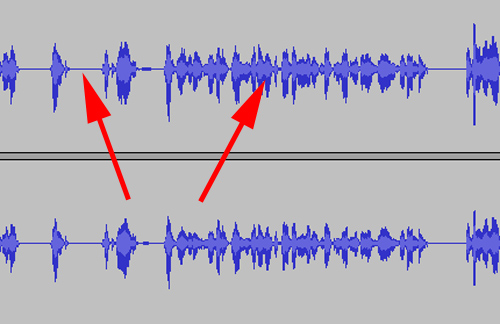
Select the gap and press Delete on your keyboard.
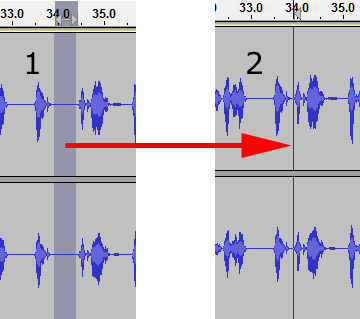
Select the recorded section and press Delete on your keyboard.
Deleting a recorded section in Audacity.Equalization
Equalization adjusts the balance between frequency components, but all you need to know right now is it gives your recording a richer sound.
Select the entire file (CTRL+A).
On the menu bar, select Effect > Equalization. (Result: The Equalization dialog displays.)
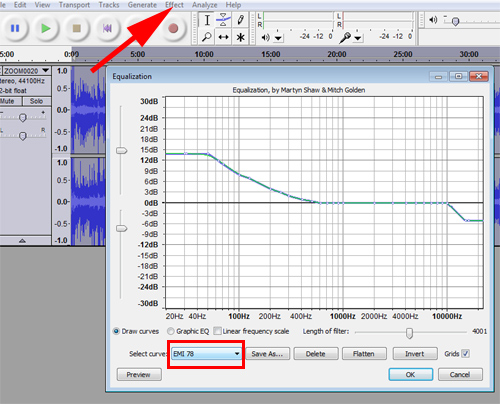
In the Select curve drop-down menu, select EMI 78.
Press OK. (Result: The recording now has a richer sound.)
Compressing the File
Compression reduces the differences between the loud and quiet parts of your recording. (We use Chris’s Dynamic Compressor plugin for compression in Audacity.)
NOTE: There may be a slight loss of quality if the loud and quiet parts of your recording are extreme. This is why it’s important to get the best sound from the start of recording.
Select the entire file.
Select Effect > Compress Dynamics 1.2.6. (Result: The Compress Dynamics dialog displays.)
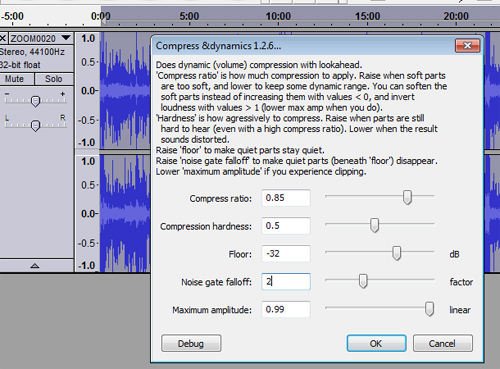
Enter the following settings (Disclaimer: Remember: these may not be the best settings for this step — just what we use.):
- Compress ratio: 0.85
- Compression hardness: 0.5
- Floor: -32
- Noise gate falloff: 2
- Maximum amplitude: 0.99
Click OK.
Result: The file compresses.
Adding Intros and Outros
We have a file with our into and outro music ready to go.

Select and copy the intro.

Paste the intro at the very beginning of the episode file.
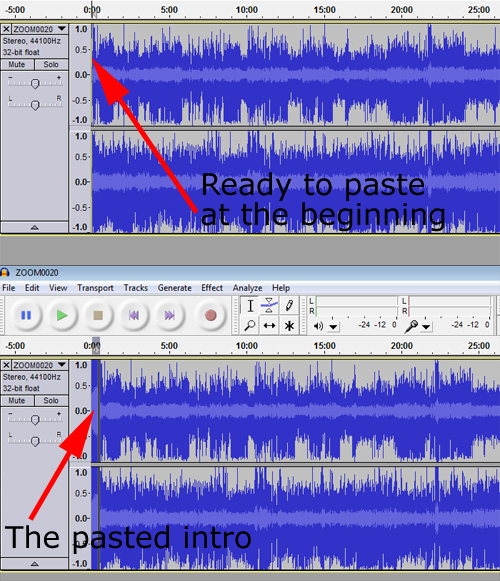
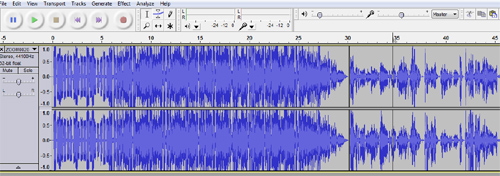
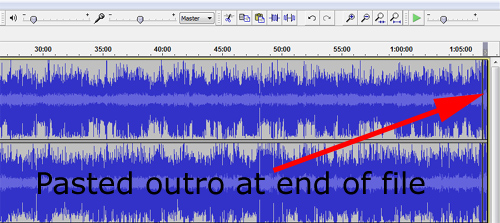
Complete the steps with the outro, copying it from the intro/outro file and pasting it at the end of the recording.
Creating the MP3
Podcasts are most often MP3 files. Creating an MP3 with Audacity is easy using the following steps.
Select File > Export. (Result: The Export File dialog displays.)
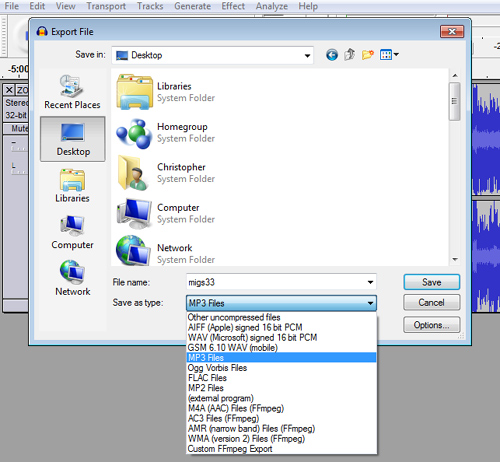
Select MP3 Files from the Save as type drop-down menu. (NOTE: Ensure the File name is what you want.)
Click Save. (Result: The Edit Metadata dialog displays.)
Fill out the metadata fields.
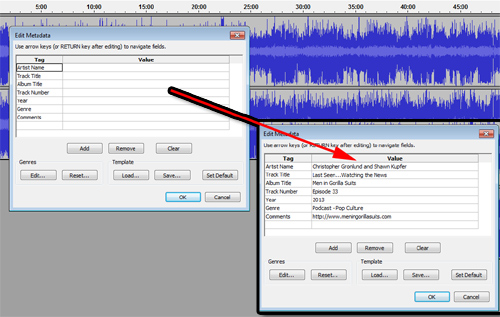
[Big Tip: After filling out the fields, click Save… and name the resulting .xml file (we named ours tags.xml). Then, with each new episode — when the Edit Metadata dialog displays, click Load…, select the tags.xml file, and you only have to update the episode number and name.]
Click OK.
Result: After the export, you now have an MP3 of the episode! (But you’re not done yet…)
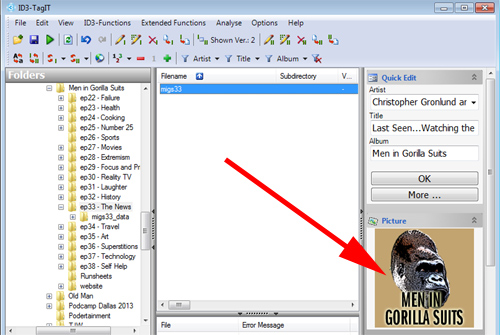
To add art to the MP3 and additional metadata, an MP3 Tag editor is needed. We use ID3-TagIT.
Open ID3-TagIT and select the MP3 file.
Click More.
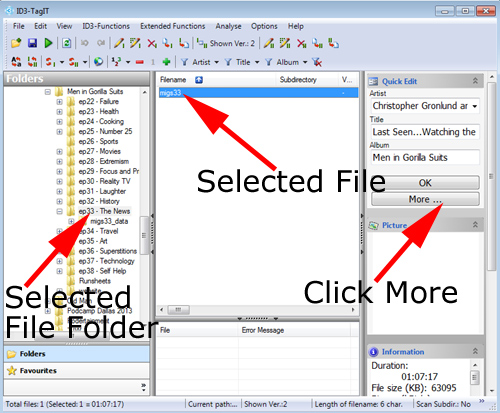
Result: The Main Entries dialog displays.
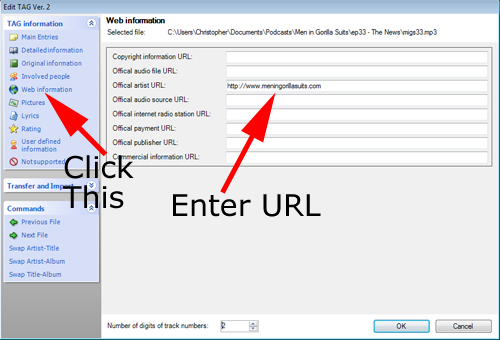
Click Web information.
Enter your site’s URL.
Click Pictures.
Click Get new picture.
Select image.
Click Open.
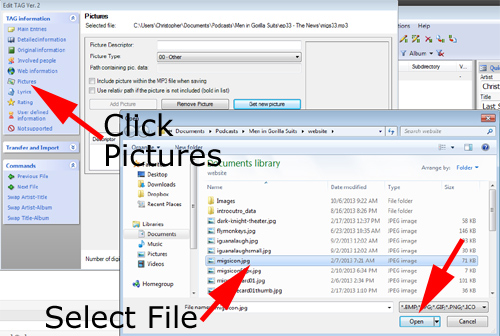
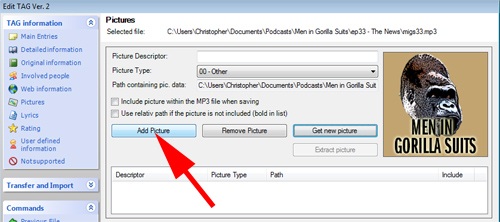
Result: The image displays in the Pictures dialog.
Click Add Picture.
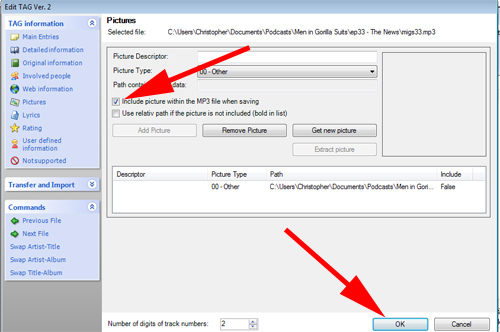
Click Include picture within the MP3 when saving.
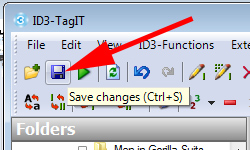
Click the Save changes icon.
All done — now to get it all online!
Getting it Online
We store all Men in Gorilla Suits MP3s on Libsyn. We use Blubrry’s PowerPress WordPress plugin to set up a media player on our site. (And to do some other things.)
To go into the settings for Libsyn and PowerPress would be separate tutorials in their own right, but it’s not that hard. Visit the Libsyn support page for Libsyn help and the PowerPress support page for PowerPress help.
Loading the Episode to Libsyn
Log in to Libsyn and click Add New Episode in the Content drop down.

Result: The New Content screen displays.
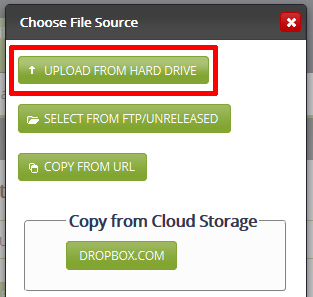
Click ADD MEDIA FILE.

Result: The Choose File Source window displays.
Click UPLOAD FROM HARD DRIVE.
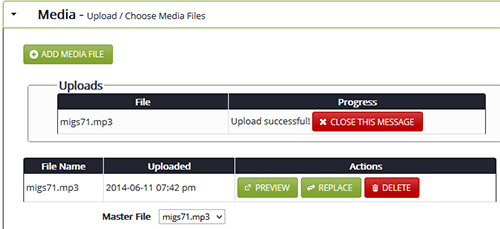
Select episode file and click Open.
Result: File upload progress displays.

When the upload is complete, Upload successful! displays.
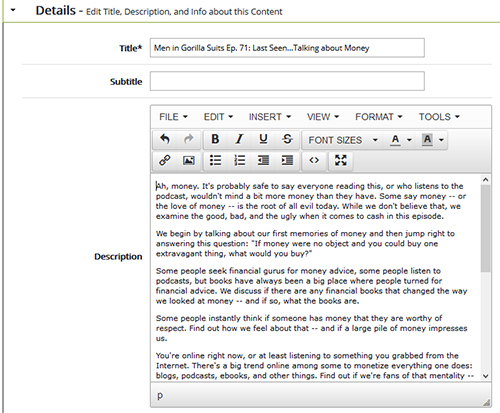
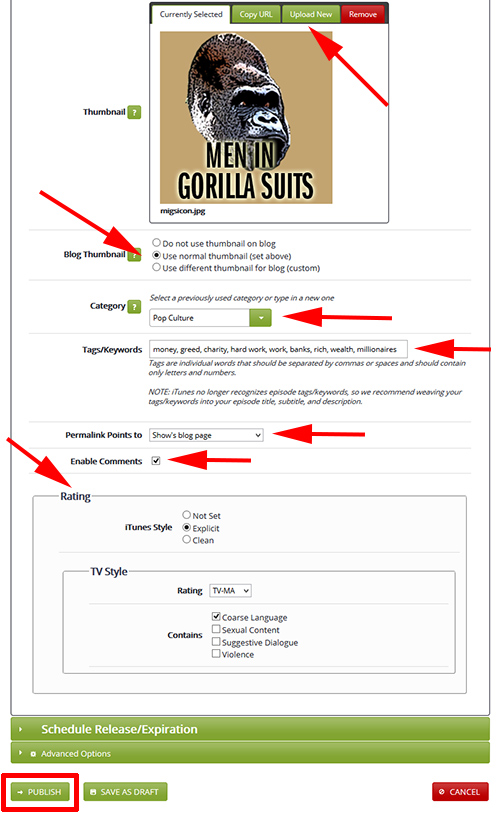
Scroll down and complete the episode details.
Scroll down, and complete the following sections:
- Thumbnail
- Blog Thumbnail
- Category
- Tag/Keywords
- Permalink Points to
- Enable Comments
- Rating
Click Publish.
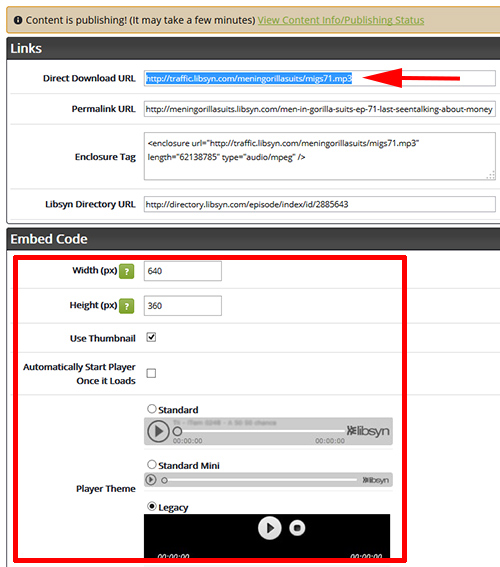
When the episode is published, highlight and copy the direct download URL and choose your player theme.
Over to WordPress
Log in to your WordPress dashboard.
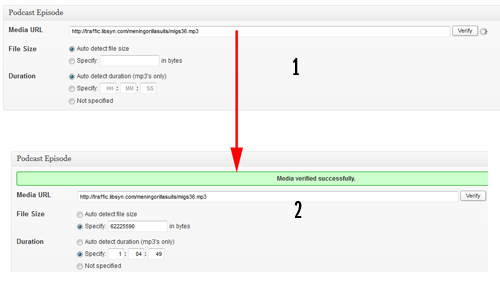
Near the bottom of the main screen, PowerPress adds a Podcast Episode section.
Paste the direct download URL from Libsyn in the Media URL field and click Verify. (Result: The Media verified successfully message displays. If verification is unsuccessful, more times than not, there’s a space at the end of the Media URL that needs to be deleted.)
Publish the entry as you would anything else on WordPress and you’re ready to go!
iTunes and All That Other Stuff
In the same way that a full tutorial about how to use Libsyn and PowerPress would make this tutorial even larger, step-by-step instruction to get your podcast feeds picked up by iTunes, Stitcher, and other places would be unwieldy. Please visit those sites for up-to-date documentation and settings.
Onward!
Now you know as much as the Gorilla Men about podcasting!
This may seem like information overload, but once you’re used to the process, it doesn’t take much time each week to process a sound file and get it online.
MP3 file creation takes about 30-45 minutes for us each week, and getting it all online takes maybe another half hour. In total (skipping drive time across the Dallas/Ft. Worth Metroplex on days we record, but factoring creating the runsheet for the episode and scheduling time to record), we put about 3 hours into the podcast each week. Most people spend far more many hours each week watching television, hanging out online, playing video games, or doing other things.
Stick with it, and it all becomes just another routine…and an awful lot of fun!
